How to Take Pictures of a Car to Sell: Phone Guide
A step-by-step guide to photographing a car for sale with your phone: preparation, settings, the 14 shots buyers expect, backgrounds and photo order.
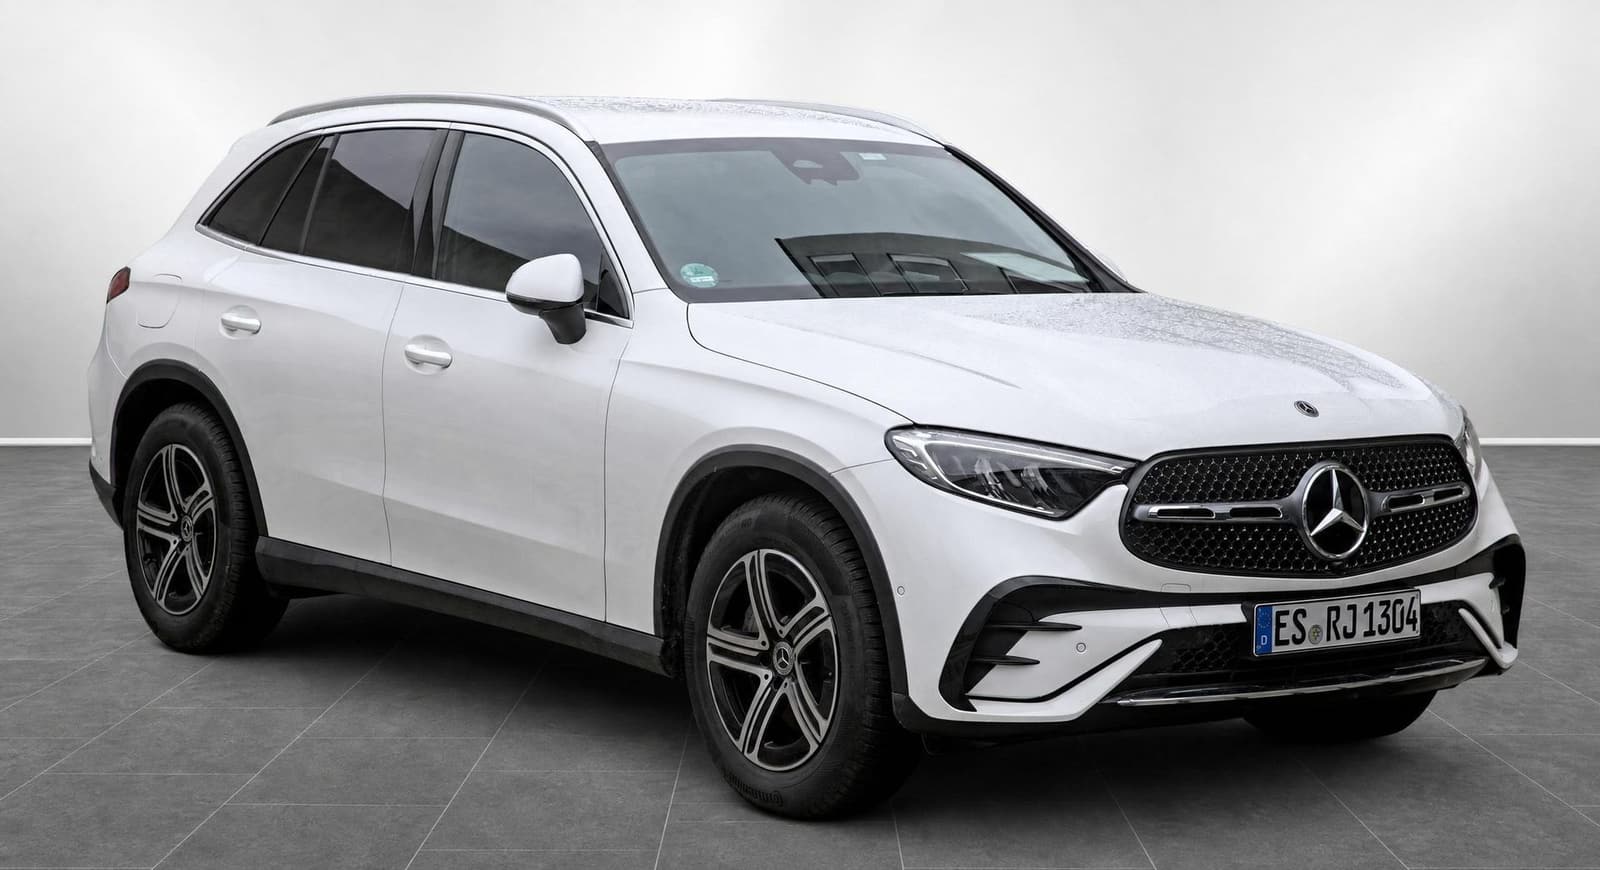
To take pictures of a car to sell, clean it inside and out, shoot on an overcast day in an uncluttered spot, use your phone's main 1x lens in landscape, and capture 14 standard angles from the front three-quarter to close-ups of any damage. Lead with the front three-quarter shot: on AutoTrader or Facebook Marketplace it becomes your thumbnail.
This guide walks through the whole process we recommend to dealers and private sellers: preparing the car, setting up your phone, the exact shots buyers expect, how to deal with the background, and how to order the photos in your listing.
Prepare the car before you pick up the phone
Photos show everything, including dust you stopped noticing weeks ago. Ten minutes of preparation does more for your listing than any editing.
- Wash and dry the car, including wheels and door sills. Water spots show up clearly in daylight.
- Clear the interior completely: phone holders, charging cables, air fresheners, parking tickets and anything in the door pockets.
- Vacuum the mats and seats and wipe the dashboard and screen. Fingerprints on a glossy screen are very visible in close-ups.
- Straighten the front wheels for the side shots, then turn them slightly outward for the front three-quarter photo so the rim faces the camera.
- Remove the plates or plan to cover them if you prefer not to show them. Many sellers blur them for privacy.
Choose the right light and location
Light matters more than the camera. Harsh midday sun creates dark shadows and bright reflections on the paint; the best results come from soft, even light.
- Overcast days are ideal. Clouds act like a giant softbox and remove harsh reflections.
- Early morning or late afternoon works too, with the sun behind you rather than behind the car.
- Pick an open, uncluttered spot: an empty corner of the lot, a plain wall, a quiet car park. Avoid other cars, bins and people directly behind the vehicle.
- Leave space around the car so you can step back far enough to fit the whole vehicle in the frame without using the wide-angle lens.
Set up your phone camera
Modern phones take excellent car photos if you avoid a few common mistakes.
- Clean the lens. A smudged lens is the most common reason for hazy, low-contrast photos.
- Use the main 1x lens, not the 0.5x ultra-wide. Wide lenses stretch the front of the car and make it look distorted.
- Shoot in landscape orientation. Listing sites display landscape images; portrait photos get cropped or shown with black bars.
- Turn on the grid to keep the horizon and the car level.
- Don't use digital zoom. Walk closer instead.
- Tap to focus on the car and lock exposure so the phone doesn't brighten a dark sky or darken a white car.
Which photos should a car listing include?
A complete listing needs about 14 photos: every exterior angle, a wheel, the dashboard, the odometer, both rows of seats, the boot, key features, the engine bay and any damage. Buyers want to inspect the car before they call you. A complete, predictable set of photos answers their questions and builds trust. This is the set we recommend:
| # | Shot | Tip |
|---|---|---|
| 1 | Front three-quarter | Your cover photo. Stand at the front corner, camera at headlight height |
| 2 | Side profile | Stand level with the middle of the car, wheels straight |
| 3 | Rear three-quarter | The mirror image of shot 1 |
| 4 | Front | Centered, whole car in frame |
| 5 | Rear | Centered, show the badge and lights |
| 6 | Wheel and tyre | Close-up showing rim condition and tread |
| 7 | Dashboard | From the open driver's door, include the steering wheel |
| 8 | Instrument cluster | Show mileage clearly and report any persistent warning lights honestly |
| 9 | Front seats | From the rear door opening, both seats visible |
| 10 | Rear seats | Show legroom and upholstery condition |
| 11 | Boot | Empty, with the floor cover in place |
| 12 | Infotainment and key features | Screen, camera, sunroof, anything that adds value |
| 13 | Engine bay | Clean, well-lit, taken from the front |
| 14 | Damage and wear | Every scratch or dent you would mention to a buyer |
Honest photos of flaws are not a weakness. Buyers who have already seen the scratch don't use it to negotiate when they arrive, and they trust the rest of your listing more.
Get the angles and framing right
Most "amateur-looking" car photos have the same three problems: the camera is too high, the car is too small in the frame, and the angle changes from car to car.
- Shoot from headlight or mid-door height. Crouching slightly makes the car look planted and proportional. Shooting from eye level makes it look small and narrow.
- Fill about 80% of the frame with the car, leaving a little space on each side.
- Keep the same distance and height for every car you list, so your inventory looks uniform in search results.
What background works best for car photos?
The best background is a clean, uncluttered one that looks the same on every car you list. A cluttered background is the fastest way to make a good car look like a bargain-bin listing. Other vehicles, fences, buildings and reflections distract the buyer and make every photo look different.
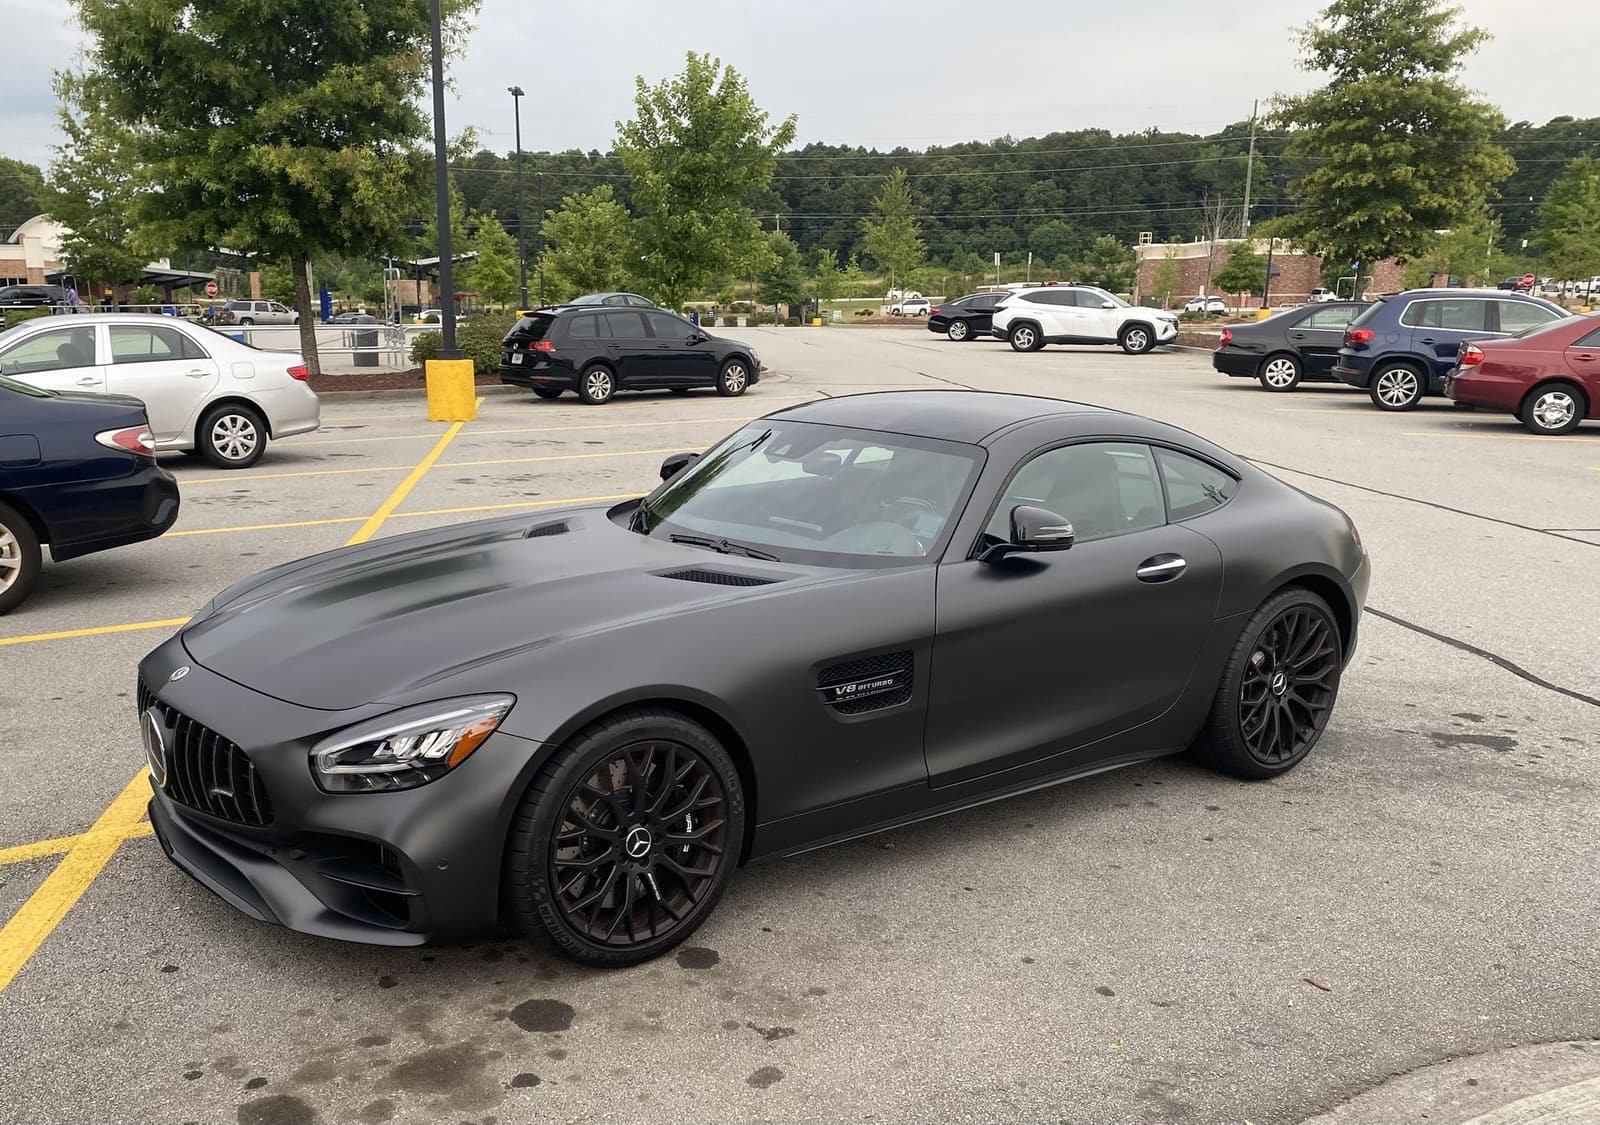
You have three options. You can use a professional studio, which gives perfect results but is expensive and slow. You can find a plain wall or open space, which is free but depends on weather and location. Or you can photograph the car wherever it stands and replace the background afterwards.
That last option is what AutoShot does: upload up to 10 photos and replace the surroundings with a studio-style background. The edit is instructed to preserve the vehicle; compare every result with its original before publishing.
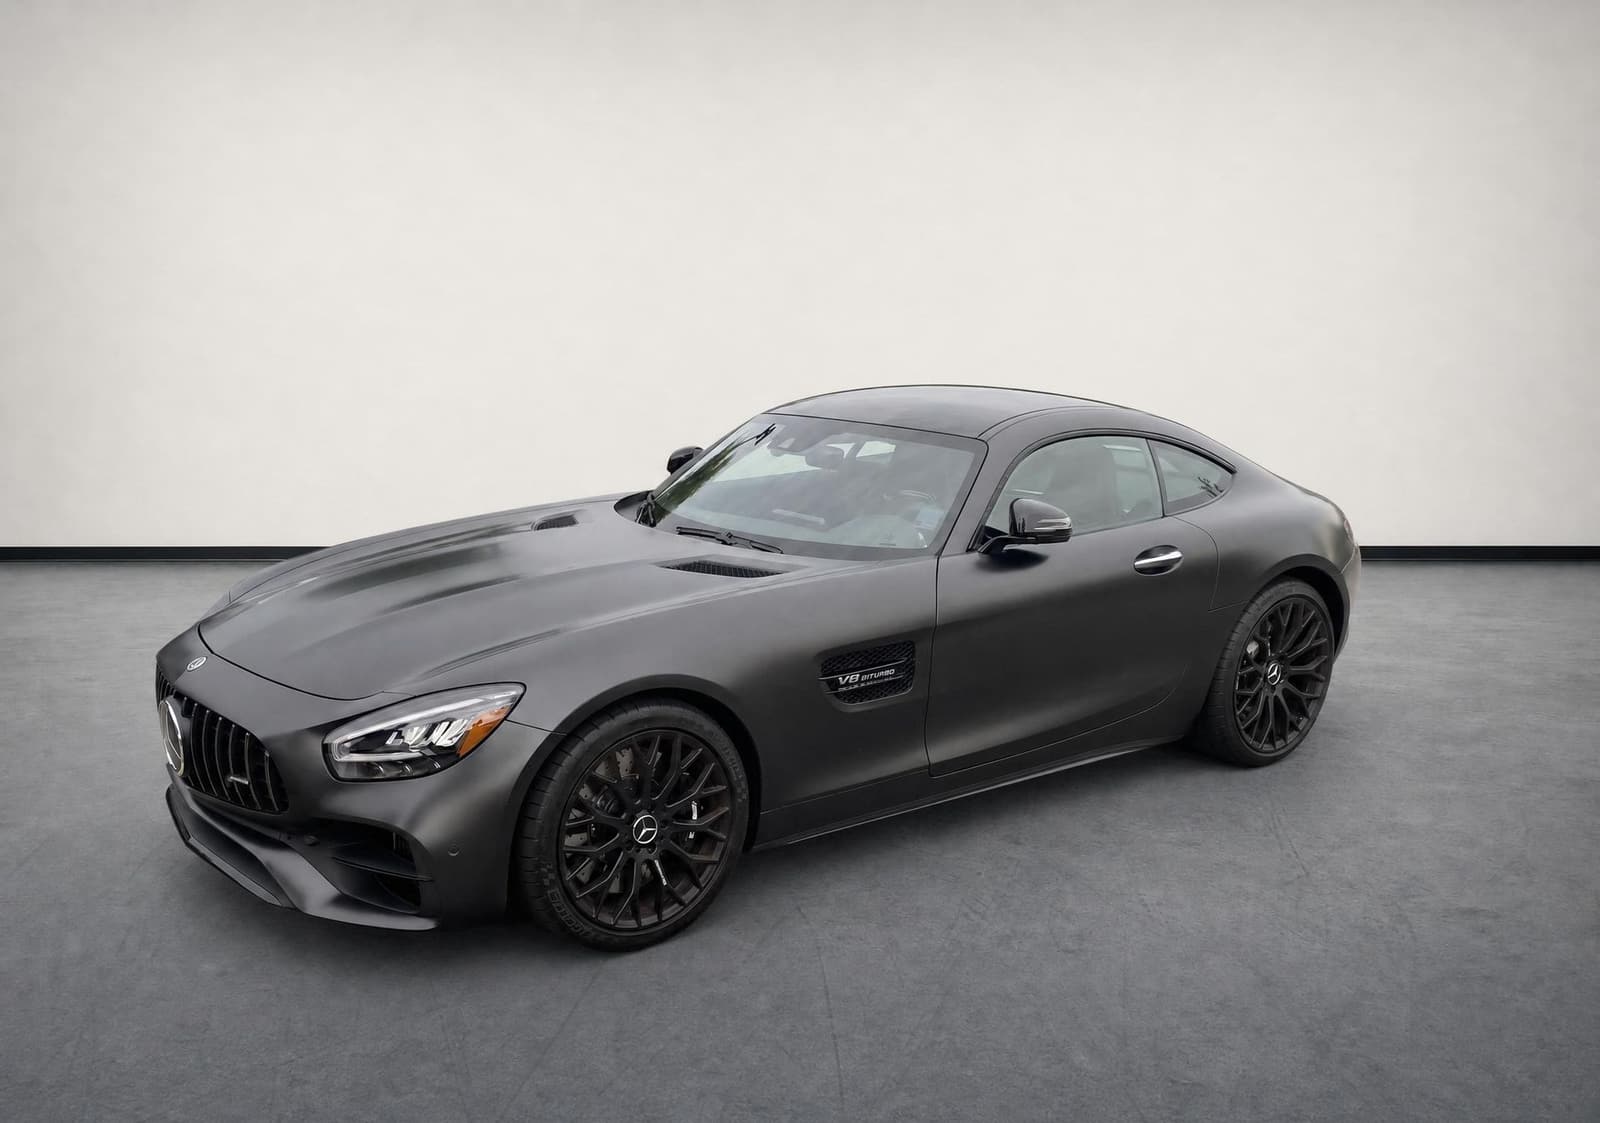
For the editing steps and result checks, follow our dealership background removal workflow. If you photograph several cars, use the inventory photo consistency workflow to keep the capture routine repeatable.
Whatever you choose, never use editing to hide damage or change the car. A clean background is presentation; altering the vehicle is misleading.
In what order should listing photos appear?
Start with the front three-quarter shot, then the other exterior angles, the interior, features, the engine bay and finally any damage. The order of your photos is part of the sales pitch. Buyers flick through them in sequence, so tell the story from first impression to details:
- Front three-quarter as the cover photo. It becomes the thumbnail in search results.
- The remaining exterior angles.
- The interior, from the dashboard to the boot.
- Features and equipment.
- Engine bay, documents and service history if you want to show them.
- Damage and wear, clearly labelled in the description.
If you sell on Facebook Marketplace, our guide to car photo backgrounds for Facebook Marketplace covers what works well on that platform.
Quick checklist before you publish
- The car is clean inside and out, with no personal items visible.
- All photos are landscape, level and sharp.
- The cover photo is a front three-quarter shot.
- The backgrounds are uncluttered and consistent.
- Every flaw you mention in the text also appears in the photos.
- The mileage photo matches the mileage in your listing.
Good photos don't need expensive equipment. They need preparation, a consistent routine and a clean presentation. If you want to see what your own lot photos look like on a studio background, try AutoShot with 10 free photos.